Canal walk 4 – The Ocean to Stroud

When the canal is navigable all the way back to Saul Junction, there will be significant canal traffic and the bridges as well as the locks will need to be used fairly frequently.

< Previous | Index | Next >

In this fourth section of the canal walk, we continue along Stroudwater Navigation. Although the canal is in working condition along most of this section it is not yet connected to any other navigable waterway except for part of the Thames and Severn Canal that we’ll cover later.

This walk is 5.0 km (3.1 miles)

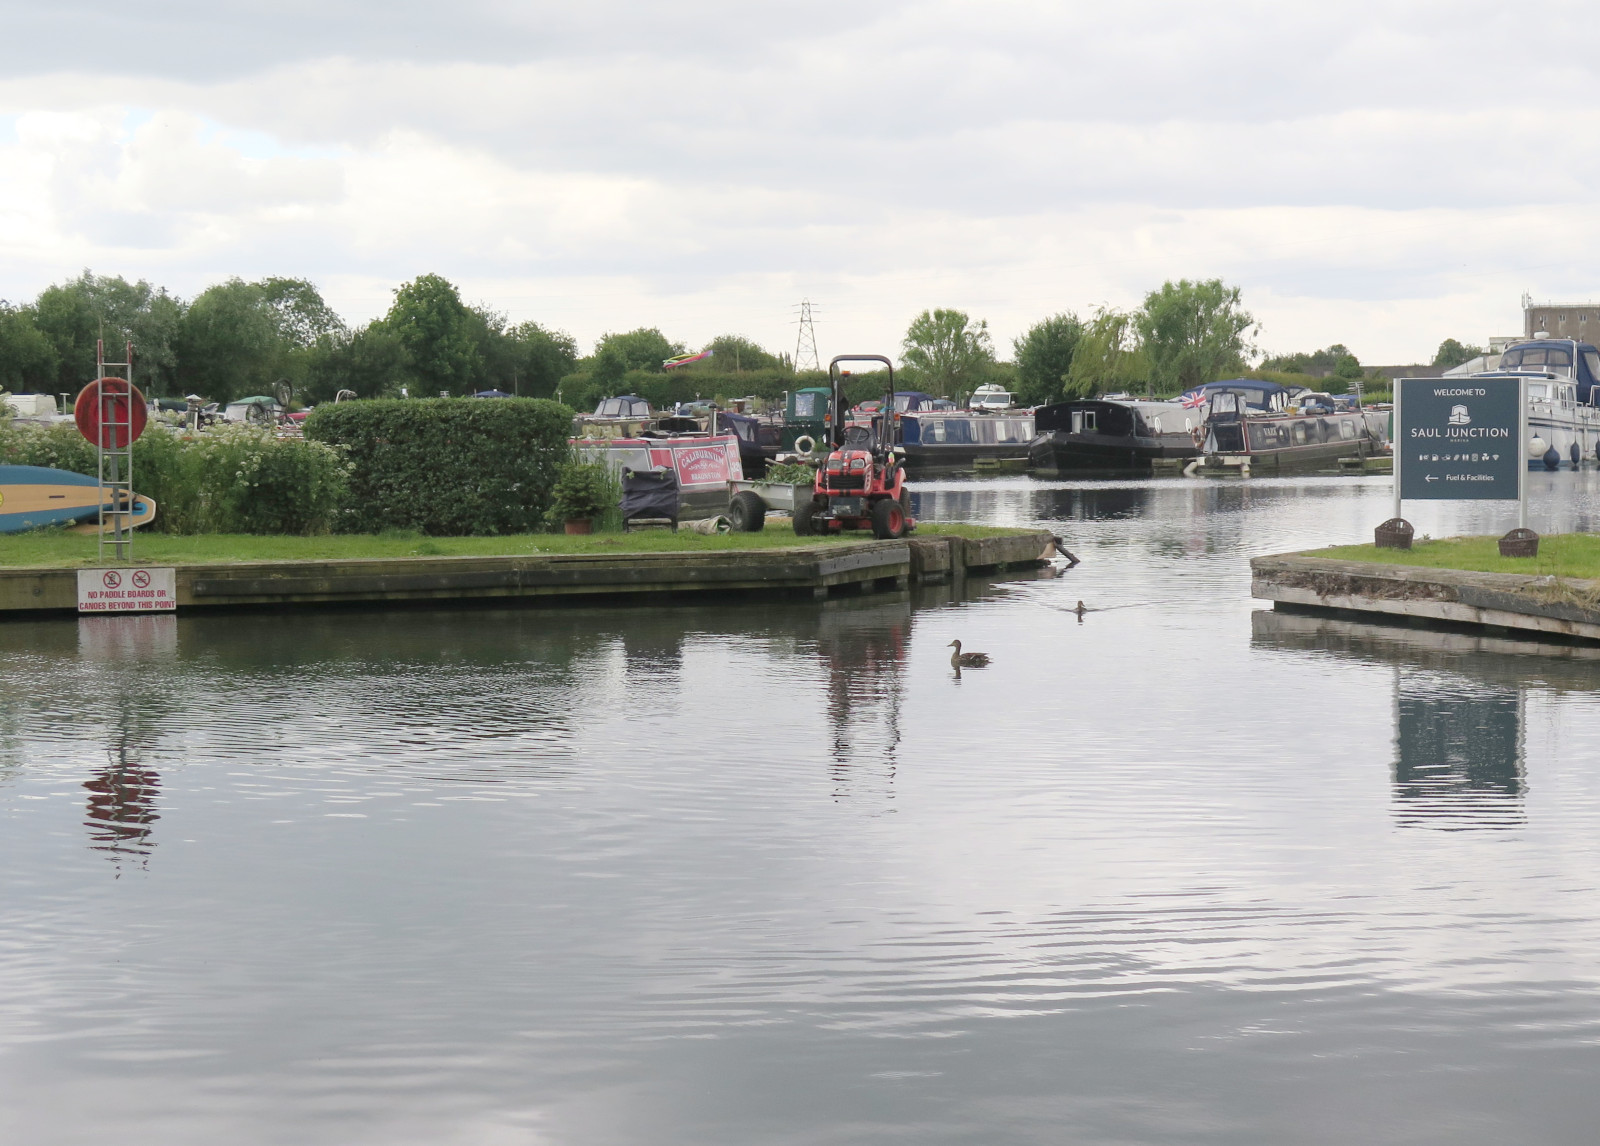
In the previous article we passed under the new Jubilee Railway Bridge and reached The Ocean. (Hint: Click the map icons for larger, draggable and scalable versions. Click the photos for full size, too.)

From the The Ocean to Stonehouse Bridge

This section is 1.3 km (0.8 miles)

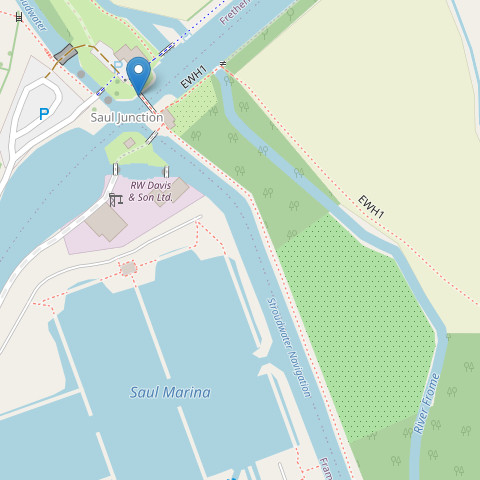
The map marker points to The Ocean at the end point of the previous walk. You can access the towpath from the A419 via Court Farm Mews, but if you arrive by car I suggest parking on Baker’s Drive or one of the roads connected to it. You can walk past St Cyr’s church to the canal, and cross the Ocean swing bridge to reach the towpath. All of this will be clear if you expand the map.

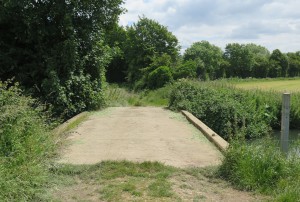
While you’re in this area you might like to walk through the nature conservation area. There are good views of the canal from Nutshell Bridge as well, accessible by footpath from the towpath (more on that shortly) or from the churchyard. When you are ready, walk east along the towpath, leaving The Ocean behind and passing under Nutshell Bridge.

Looking back to Nutshell Bridge

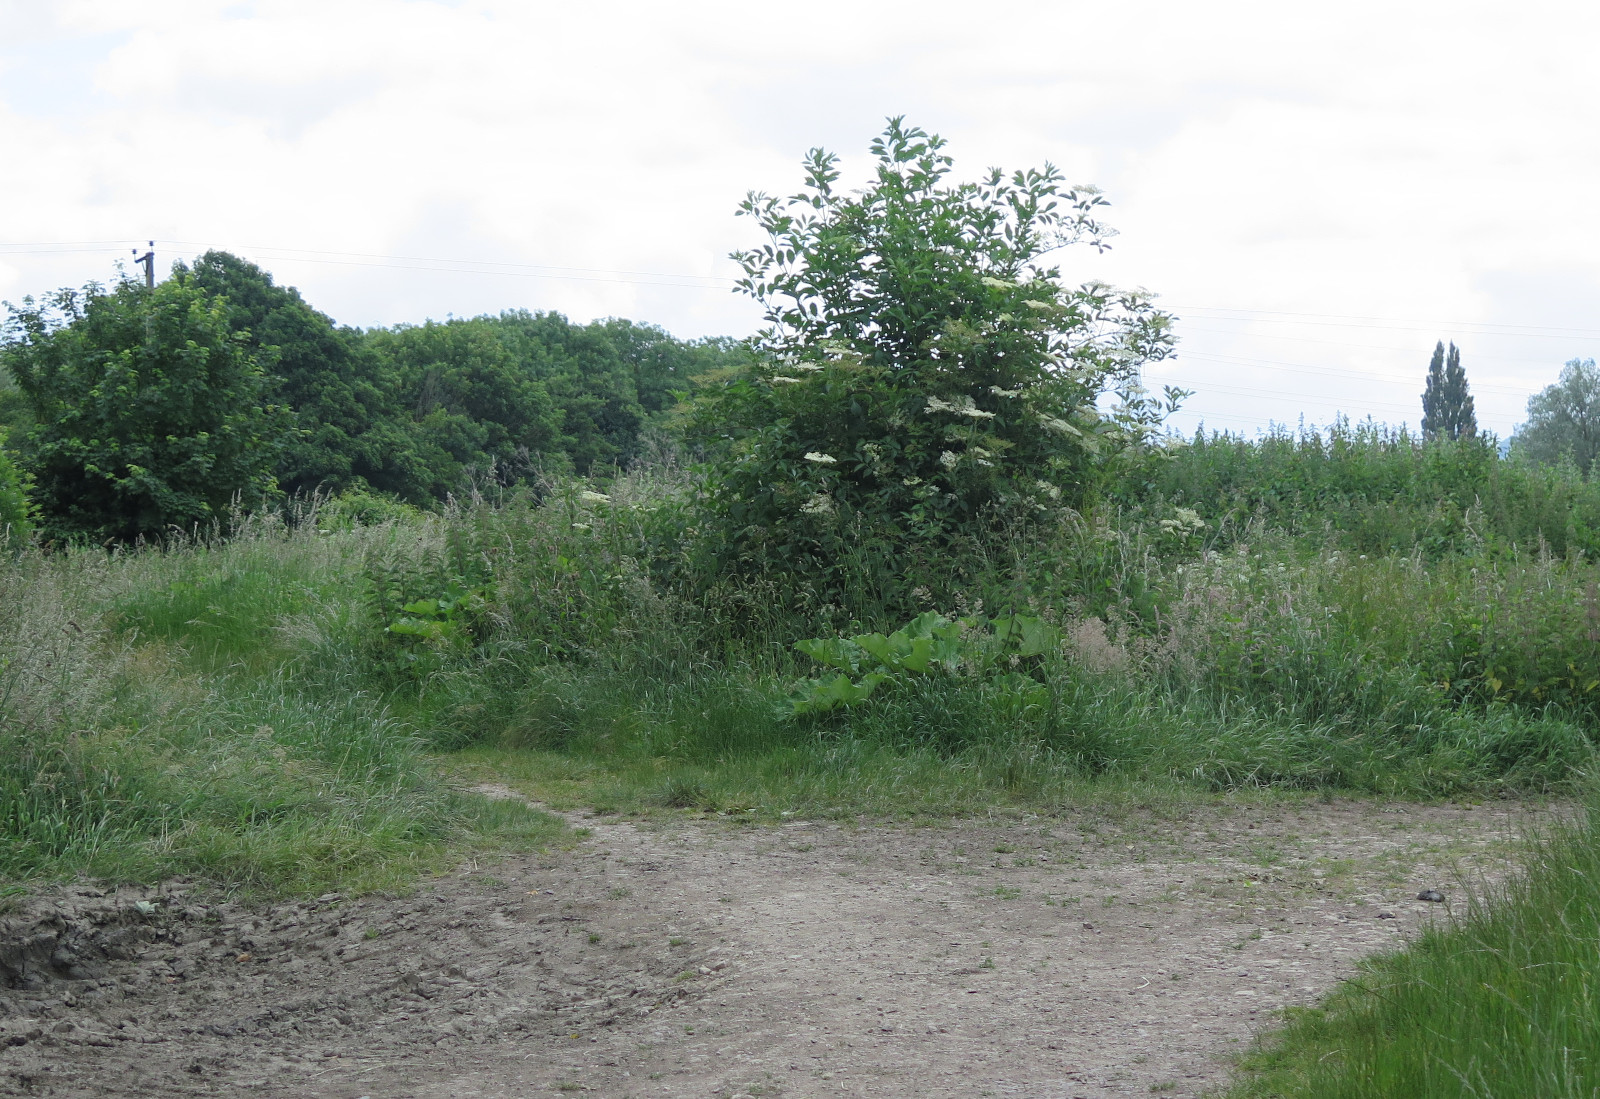
There is no direct access to the bridge from the towpath, but about 60 m beyond the bridge, look for a narrow footpath leading away from the canal. If you want to access the bridge from here, take this footpath, turn right onto a similar path at the four-way crossing, then right again to cross the bridge. Retrace your steps to return to the towpath. Next you’ll pass Boakes Drive (photo below) where modern, brick-built homes have enhanced surroundings provided by the canal, you might even see boats in the canal at this point, although currently they can only travel moderate distances.

Boats on the canal at Boakes Drive

A little further on again you pass under Stonehouse Bridge with its murals. This modern bridge carries the Stonehouse to Leonard Stanley, Dursley and Nailsworth road. It was built by Gloucestershire County County in 1999.

Stonehouse to Ebley Mill

This section is 2.0 km (1.2 miles)

Ryeford Bridge and a canal workboat

After one further bridge and some woodland on the left bank, look out for ‘Skew Bridge’. This is an old iron Midland Railway bridge that crosses over the canal at an angle (hence ‘skew’). The railway was closed in 1966 and now the bridge carries a cycle route. Immediately after Skew Bridge, the A419 passes over the canal, as does Ryford Road North, this time on a fine, slightly humped, stone bridge with a brick parapet (photo above). As you continue, look for the Ryeford footbridge with white, criss-cross pattern sides, and then you’ll pass under the black gantry of a pipeline bridge.

The next point of interest is a little further on; the Ryford double-lock with three lock gates was built to allow a greater rise in a short distance. Walking on from the double lock brings you to a part of the canal undergoing dredging (at the time of writing).

Dredging is an essential form of maintenance because canals typically get shallower over time due to a build up of silt on the bottom. Dredging when necessary restores the full depth of the canal allowing deeper draught vessels to use the canal.

In the event of active dredging, signs will re-route you to the towpath further along to avoid dangerous areas and allow the work to continue uninterrupted.

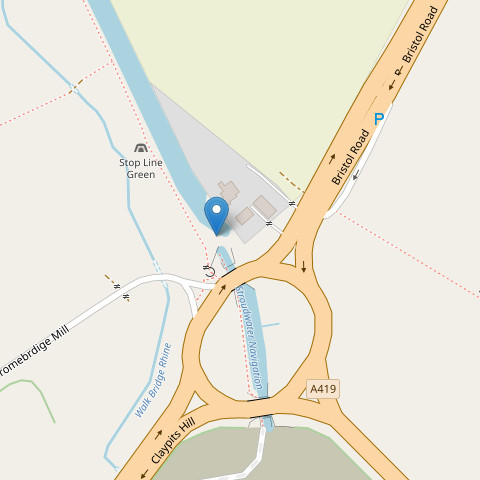
Passing under Oil Mills Bridge brings you to an attractive housing development with homes and gardens along the opposite bank. After the canal was opened, industry spread to this area (Ebley) from the Stroud direction, you’ll see plenty of evidence for this. The chimney of Ebley Mills is particularly impressive, and even the newer, residential blocks echo the shapes of the warehouses of the past. This is a good place for a coffee and a snack with pleasant indoor and outdoor seating. Cross the Ebley Wharf Bridge to the little square (expand the map, the pointer marks the bridge) and you’ll find Kitsch coffee-bar (K coffee-bar on the sign). Check it out on Trip Advisor or just take my word for it.

One other feature you might wonder about is the single lock gate across the canal, but there’s no lock! It’s part of an ingenious flood-prevention measure, diverting flood water to the River Frome whenever that becomes necessary.

Ebley Mill to Stroud

This section is 1.8 km (1.1 miles)

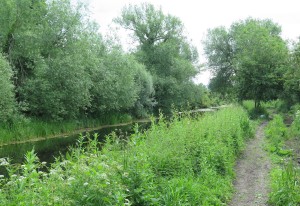
Now for the final section of this canal walk. Continue walking east from Ebley Mill along the towpath which takes you between the canal and the River Frome. You will pass Queen Elizabeth II Playing Field on your right, quite likely you’ll see the children’s play area with its ‘canal boat’. I walked over to take a look at this, it’s evidently inspired by Stroudwater Navigation and no doubt much enjoyed by younger children.

Ella’s boat and other murals

Hilly Orchard Footbridge is another, black, girder structure on brick piers; the towpath passes underneath. This is followed by Dudbridge Road Bridge carrying the A419; as you walk underneath this large, concrete bridge you’ll see a lot of fine murals painted by local schoolchildren, many of them showing refreshing, young humour at its best. One of my favourites is ‘Ella’s Boat’ making big waves washing over the sides of a bridge. It’s hard to work out which way the boat is moving, but it’s definitely travelling much too fast for the Stroudwater Navigation!

Chestnut Lane Bridge

After the A419 bridge and its memorable artwork you will reach Dudbridge Lock and then Foundry Lock. This pair of locks needs further repair after initial restoration some time ago. Several other things are going on here, there’s a turbine generating electricity between the two locks as well as a water discharge to Ruscombe Brook and two weirs. Continuing the walk you will pass Chestnut Lane Bridge and then Lodgemore Lane Bridge, many of the opening bridges can be operated by anyone holding the correct key. With the canal in its present state the bridges rarely need to be opened, but in a few year’s time, when the canal is navigable all the way back to Saul Junction, there will be significant canal traffic and the bridges as well as the locks will need to be used fairly frequently. This will bring new challenges with water supply and traffic management.

As you return to a more industrial area, you will pass through an opening in a dressed-stone wall. As you do so, look carefully at the stonework on the left side of this entrance. The deep, horizontal grooves in the stone were caused by the rubbing of barge tow ropes over many years of use. They are a visible relic of the passing of countless barges, bargees, horses and ropes over a couple of centuries!

Thames and Severn shake hands

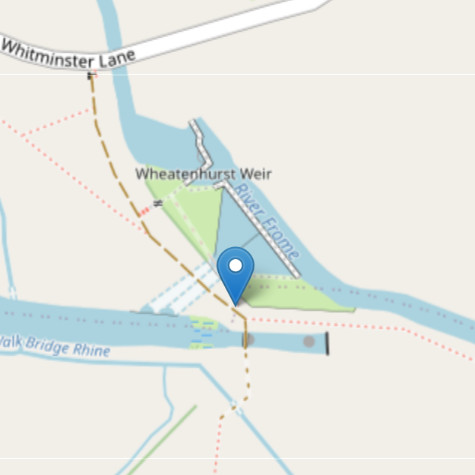
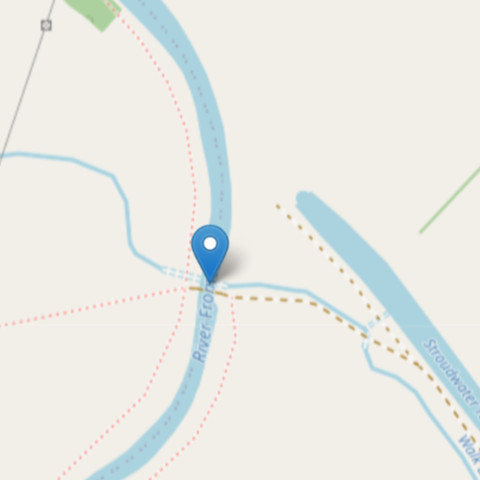
Just a short distance more and you will come to a monument by the towpath (open the map below, the marker points to the monument). This is the end of the Stroudwater Navigation. We are now in Stroud where coal from South Wales and the Forest of Dean would have been brought by barge from the north and west bank of the River Severn for use in Stroud’s many spinning and cloth weaving mills. Traditionally these had been water powered, but the arrival of steam power required coal, and this could be obtained more cheaply than before once the canal had been built with some of the cost savings providing profit for the canal owners and barge operators.

The Thames and Severn Canal was constructed to continue the waterway further east to make it possible to take goods from Stroud to Lechlade on the River Thames. It opened in 1789, ten years after the Stroudwater Navigation. The next part in this series will continue eastwards from the shaking hands monument as we explore the Thames and Severn Canal.

Canal walk 4 is complete, so thanks for coming along.

See also:

*This is a great source of canal images, history and all sorts of detail. Highly recommended and well worth exploring!

< Previous | Index | Next >

Useful? Interesting?

If you enjoyed this article, please like, comment, and share below. My material is free to reuse, but a coffee is always welcome!

Canal walk 3 – A38 to The Ocean

Standing on the bridge and looking left you will see the course of the new section and work ongoing in preparation for excavating the channel.

< Previous | Index | Next >

Heading further south-east from the A38 roundabout we cover the ‘Missing Mile’ and then reach a section under heavy repair, and finally a section that is actually navigable. Read about it in this third article.

In the previous article we reached the short, new section of canal inside the A38 roundabout. (Hint: Click the map icons for larger, draggable and scalable versions. Click the photos for full size, too.)

From the A38 to the M5

This time. we begin from the gate between the field and the centre of the roundabout; the map marker points to your initial position on the roundabout. Facing the roundabout, turn right and cross the exit and entrance of Fromebridge Mill, then follow the footpath along the right-hand carriageway of the A38. This is not a pleasant walk, but fortunately it’s not long.

Look out for the point where the road crosses the river, and 50 m beyond that you need to cross both carriageways (with great care, one carriageway at a time, the traffic can be fast). Find the footpath through the gate on the other side of the road. The map marker points to the path and the photo below will help you identify the gate you need.

Start of the path along the Frome

This footpath runs along the south-east bank of the River Frome and gradually approaches the M5 motorway which you’ll soon see and hear ahead of you. If you spot any markers for the Thames and Severn Way you can safely follow them for now.

The Stroudwater Navigation canal is filled in at this point and was some distance beyond the river but running roughly parallel. This is part of the section called the ‘Missing Mile’, the remainder of it is the other side of the M5. The river runs under the motorway, while the footpath passes through a tunnel alongside the river. Sometimes water and mud collects just inside the tunnel entrance; hopefully your footwear will be up to the task of passing this point and you’ll emerge on the eastern side of the M5.

Taking the canal under the M5

You’ve just walked beneath the M5, but how will the canal manage it? The original canal passed some distance north-east of the footpath tunnel and it would very expensive indeed to build a new route under the motorway. However, the River Frome passes under the M5 and it was decided that the best solution is to divert the canal from its old route and share the channel used by the river. A barrier will be built under the road to separate the river and canal from one another.

The Missing Mile will need to be re-dug, but along a slightly different route to take the canal from the A38 roundabout to the M5 crossing, and then joining up with the remaining canal by another new section returning to its original route again.

The gravelled track

Meanwhile our walk takes us along the river bank until we reach a road called Springhill in the village of Churchend. Turn left on to the road and in a short distance, take the gravelled track on the left (see photo).

At the far end of the short track you will come out near to a brick bridge. This is Westfield Bridge, part of the original canal and it marks the other end of the missing mile.

The map marker is centred on the middle of the bridge. Standing on the bridge and looking left you will see the course of the new section and work ongoing in preparation for excavating the channel. Looking right you will will see restoration under way on the original canal as it continues eastwards. The brickwork for Westfield Lock (aka John Robinson Lock) is under reconstruction right by the bridge (photo below). The Missing Mile is all behind you now!

Westfield Lock

At the bridge, look for any temporary signs for the towpath (a public footpath at this point). The path might be before or after crossing the bridge; if possible, you need to turn right (east) from the bridge along the canal. Note: if the footpath is closed because of the ongoing work, the alternative is to return down the track back to the road and turn left up the hill to Pike Bridge. But assuming the footpath is open, along the way you’ll see a lot of work ongoing to restore the old canal to a working state. Several locks are being actively worked on. The footpath takes you up to Pike Bride where you can look back to get an excellent view of the ongoing work. Cross the bridge and you’ll see the continuing canal in water and in good condition.

Onward to The Ocean

Follow the towpath east from Pike Bridge, after passing Pike Lock on your right, the first thing to note is the riveted, iron narrowboat ‘Leviathan’, used until the 1990s as a workboat by restoration volunteers. Another 150 m brings you to Blunder Lock, very close to the A419 road and the second in a ladder of locks – Pike, Blunder and Newtown. Blunder Lock probably got its name because it was dug to the wrong depth by the engineer, despite clear and detailed instructions.

Bond’s Mill

Another 90 m brings us to Newtown Lock and we start to get away from the A419; the tow path takes us through an idyllic, wooded area with a peaceful canal full of water as it would have been as a working waterway. Bond’s Mill is the next landmark and the unusual two-storey World War II pillbox is notable. It’s worth stopping for a while if you have time. Sometimes the pill box is open, but if not there are useful information boards on the outside.

Ocean Jubillee Bridge

Soon after Bond’s Mill comes a major achievement, the Ocean Jubilee Bridge. The canal was here before the railway, of course, and when the railway was built, they simply constructed a bridge to cross the canal, just as they would to cross a river or a road. The canal went out of use, largely due to competition from the much faster and more efficient railways; over time the bridge needed replacement. When the time came to do this, the railway engineers decided that a culvert would suffice, with the embankment extended over it. This left the disused canal in a state where it could not be restored without building a new bridge. Network Rail engineers did exactly that, and the result is what you see today.

And, finally for this part of our canal journey, walk under the bridge and take a look at the widening of the canal at this point. This body of water, a haven for wildlife of all kinds, has been known for a very long time as ‘The Ocean’. Nobody knows for sure how or why it acquired that name, but it might have been the largest body of open water known to the local people.

That’s it for Canal walk 3, thanks for travelling with me.

See also:

*This is a great source of canal images, history and all sorts of detail. Highly recommended and well worth exploring!

< Previous | Index | Next >

Useful? Interesting?

If you enjoyed this article, please like, comment, and share below. My material is free to reuse, but a coffee is always welcome!

Canal walk 2 – Saul Junction to the A38

There was an aqueduct close to this point where the canal crossed over the river

< Previous | Index | Next >

Heading further south-east from Saul Junction there are several little pieces in good shape, and a lot of repair work ongoing. You can read all about that work right here in this second article.

Saul Junction
Saul Junction Marina

As mentioned in the previous article, the Stroudwater Navigation continues straight across the much larger Gloucester and Sharpness Canal. Looking south-east across the ship canal you can clearly see Stroudwater Navigation continuing, not only full of water, but still in use. We’ll cross the footbridge and follow it from that point. (Hint: Click the map icons for larger, draggable and scalable versions. Click the photos for full size, too.)

Walking south-east across the footbridge (see pointer on map) there is a right-hand bend and then an opening from the canal to a thriving marina.

The canal itself is very wide at this point and there are many moored boats alongside the towpath, The photo shows the widened Stroudwater Navigation in the foreground and the marina entrance. From here, the towpath continues to Walk Bridge.

Originally built as a swing bridge, Walk Bridge was replaced by a concrete and brick constuction, so a new opening bridge must be constructed to replace it. Cross the road and it’s clear that the canal is still in water at this point, but there’s no towpath. Enter the field by the stile, turn left, and walk diagonally across the field to the far side leaving the canal behind and to your right.

This brings us to Whitminster Bridge and Lock where there’s another glimpse of the canal’s remains. The photo below shows the point marked on the map. Turning a couple of metres right along the farm track will give you a view of the old canal lock. There was another swing bridge at this point.

Easy to go wrong here!

The small footpath to the left in the photo is part of the towpath and this is the route to take next. As you follow this path you’ll see the River Frome on your left. The canal has been filled in and would have been on the right.

The path and the river both bend to the right and then the path enters a strip of woodland along the river bank.

Through the wood

The path is poor, with large potholes filled with mud after prolonged rain. Care is needed and there are many roots that form real trip hazards, but the woodland doesn’t continue for very long (250 m or so) so slow and careful won’t reduce progress very much overall.

Once again, the river and footpath bend to the right, look for a concrete farm bridge (photo) across the river and take it, you’ll soon have the canal on your right. There was an aqueduct close to this point where the canal crossed over the river, but it no longer exists and the canal has been filled in for a short distance.

The map marker points to the bridge mentioned above; if you expand the map you can see the end of the woodland at top left and the canal section in water as well as the filled in part.

That looks more like a canal now!

The next major feature is a crossroads of tracks and footpaths, there’s a post here with a blue Cotswold Canals sign which you should follow. The canal is in water again at this point, stand on the track where it crosses the canal and you can see it for a long way in both directions. you’ll also have a clear view of the canal as you continue along the towpath (photo). At the time of writing dredging work is underway on some days. If you’re unlucky parts of the towpath will be closed and you’ll be redirected. But most likely it will be open (and is always open at weekends and on summer evenings).

On to the bridge and pillbox

The final section of this walk is quite straightforward – just keep following the towpath. There are some interesting things along the way though, and an unexpected treat at the end as well. On your way you may see evidence of the dredging work still active along this section.

When you come to a stile, cross it into the next field and continue on the towpath. A little further and you’ll notice a large pipe acros the canal and just beyond it a brick-built bridge, this is ‘Occupation Bridge’. The pipeline was constructed during World War II, part of a network to carry aviation fuel for the RAF. It is still in use and will need to be diverted beneath the canal.

Beyond the bridge you’ll find a pillbox (also WW II) near the right bank of the waterway, and shortly afterwards you’ll arrive at the destination for this article, the A38 roundabout. Here comes the unexpected treat I mentioned earlier. Make your way through the galvanised steel gate and turn left, a short downhill scramble. Here you can pick up the towpath again and explore a newly built section of canal crossing the centre of the roundabout. So astonishing to see a newly built canal in the middle of a major intersection!

The canal here was built by National Highways who also constructed the roundabout. When you reach the far side you’ll see that the canal currently ends at this point. The ‘Missing Mile’ begins here and we’ll explore it in the next article, ‘Canal Walk 3’.

See also:

*This is a great source of canal images, history and all sorts of detail. Highly recommended and well worth exploring!

< Previous | Index | Next >

Useful? Interesting?

If you enjoyed this article, please like, comment, and share below. My material is free to reuse, but a coffee is always welcome!

Canal walk 1 – Severn to Saul Junction

Severn trows were flat-bottomed, single masted sailing vessels, and the Stroudwater canal was wide and deep enough to take them.

< Previous | Index | Next >

This section of Stroudwater Navigation is not being restored, but it is certainly of historical interest and mostly remains visible on the ground. It’s still possible to walk almost all of the towpath and not too hard to imagine what it might have been like when it was in use.

The connection to the River Severn
The River Severn at Framilode (near high tide)

The physical point where the canal joined the Severn is not accessible as it’s on private land. However, it’s easy to get very close. The River Severn is still tidal at this point, and the canal engineers had to take this into account. Instead of a single lock gate providing access, there were several; this allowed boats to transfer between river and canal for longer periods as the tide ebbed and flowed.

To find this spot on the ground, visit the village of Upper Framilode and look for the point near Lock House where the road crosses the line of the canal, then click the tiny map on the right for a larger, draggable and scalable version. The pointer shows where the canal and river meet, the place where Severn trows and other boats would have entered the canal heading towards Stroud, or exited into the Severn to make their way north towards Gloucester, Hereford and Worcester, or south towards Bristol and the River Wye to Chepstow and Monmouth. If you have time, pop into St Peter’s church in the village and enjoy the simple stained glass and the beautifully painted ceiling. A peaceful place, used by the local community in many interesting ways.

Severn trows were flat-bottomed, single masted sailing vessels, and Stroudwater Navigation was wide and deep enough to take them, with locks sized accordingly.

You can also view a map of the canal from the 1840s to compare with the current map. This, too, is draggable and scalable. If you open two browser windows side-by-side with the modern map in one and the historical map in the other, it’s fascinating to see the many changes that have taken place.

To start the walk south from Upper Framilode, look for the footpath just left of the canal as seen from Canal Row. This is the old towpath and runs between the canal and the row of buildings that grew up along the first 100 m of the canal. Presumably most, if not all, of these buildings sold necessities to the passing canal traffic. I can imagine everything from ale to fresh well water and hens eggs and other garden produce being traded while boats loaded and unloaded or just waited for a lock to fill or empty.

Heading south
View back to Canal Row – from left are the canal, grassy towpath, and row of buildings

The first landmark you will come across is ‘The Ship’ inn. You’ll pass the pub and then its car park, both on the left. After passing it, looking back you’ll see its name painted on the building’s wall. It’s only 250 m or so from the start of the walk.

It’s not hard to imagine the trows travelling to and fro along this section of the canal. No doubt the pub was a popular stop.

The Ship Inn, looking back towards the start

As you can see, this first section of canal is still in water, and along the way you will have noticed the large stones edging the canal. Lock gates and other wooden structures have long since gone, of course, rotted away by the action of rain, fungi and bacteria. Like all human technology, canals must be maintained if they are to continue working. Although there’s still water at this point the canal is certain to be heavily sited up, and reeds, rushes and other water-tolerant and water-dependent plants have colonised very effectively.

Saul Bridge

The map marks the next point on the journey, the place where Moor Street crosses the canal over Saul Bridge. It’s the first bridge you come to and is not far beyond The Ship Inn. Originally this was a swing bridge, but the modern replacement is concrete and brick. Continue along the towpath beyond the bridge and you quickly come to the end of the section of canal remaining in water. The scene changes quite a bit from here on.

The River Frome comes alongside the tow path on the left at a point where the canal (still on the right) becomes dry; you can see this point on the map in the previous section. Don’t be confused! For a while you will see the Frome on the left of the tow path and the dry canal on the right. In places the canal has been filled in and that makes things even more difficult to visualise. Sometimes you can spot the left bank of the canal as a curved ridge, even when it runs through an open, grassy field. The towpath would probably have run along the flat top of this ridge.

River, footpath, and the bank of the canal

Just keep walking on the footpath and you’ll be OK. If you see signs for the Thames and Severn Way, Cotswold Canals Trust, or Saul Junction follow them; they will all guide you along this section of the canal. After the section of infilled canal, there’s a very overgrown part, and finally the footpath opens onto Saul Junction itself.

Here, the Stroudwater Navigation (opened in 1779) continues straight across the much larger Gloucester and Sharpness Canal, which opened in 1827, carries much larger vessels, and connects Gloucester Docks with Sharpness. At Sharpness, vessels can continue on the river to and beyond Bristol. Look across the ship canal where you will see Stroudwater Navigation continuing, not only full of water, but still in use. I’ll write about that next section in a future article.

Once the ship canal was open, it made a much better, non-tidal route to Gloucester or Bristol, and that’s why this section of the Stroudwater Navigation languished and fell out of use. The crews of trows coming and going to Stroud simply had no reason to enter the Severn from Saul Junction after 1827.

See also:

< Previous | Index | Next >

*This is a great source of canal images, history and all sorts of detail. Highly recommended and well worth exploring!

Useful? Interesting?

If you enjoyed this article, please like, comment, and share below. My material is free to reuse, but a coffee is always welcome!